
Hammock or Ohio Patch
A Hammock Patch is not as well known as either the strapped backing patch or the California patch. The name Hammock Patch describes the method used. It is used in Northeast Ohio as a quick and easy method for patching small to medium-sized holes in drywall or plaster walls. It can be used where there are no good options for drywall backing. A Hammock Patch uses the stability of the surrounding drywall to hold itself in place similar to the way a California patch is secured, however, it is more secure since it is supported on both the front and back sides with mesh tape.
Step 1
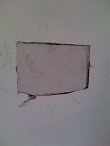
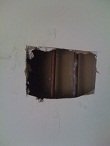
Cut a piece of drywall to the exact shape and size of the hole being repaired. If the hole was created intentionally, for example, to access electrical wires or boxes in the wall, the piece of cut-out drywall can likely be used for the patch.
If a new piece of drywall must be cut, try to match the shape and size of the hole as closely as possible. It is not necessary to match the thickness of the drywall used. For example, if the wall being repaired has half-inch drywall, it is not a problem if you use five-eighths inch drywall for the repair.
If the hole has very jagged edges, it can help to cut the hole square on all sides using a keyhole saw. This will allow you to cut a piece of drywall that fits perfectly.
Step 2
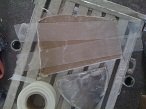
Cut a few strips of mesh tape approximately 4 inches longer than the width of the piece of drywall you will use for the patch. Cut enough strips to lie side by side on the back side of the drywall patch.
Place the strips of mesh tape on the backside of the drywall patch. They should hang over on both sides evenly. The extra material will serve as tabs to attach the patch to the wall. See the picture for details.
Step 3
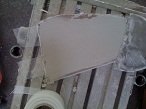
Use quick-set drywall mud, or hot mud, to bed in the mesh tape securely on the back side of the drywall patch. These strips of mesh will provide backing support to prevent the patch from being pushed in from the front.
Step 4
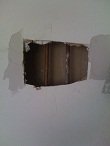
Spread quick-set drywall mud (hot mud) on both sides of the wall surrounding the hole. The long ends of the mesh tape will be set in this mud securing them to the wall surrounding the patch. The mesh tape strips will act like a hammock for the drywall patch as if it is hanging in the drywall hole.
Step 5
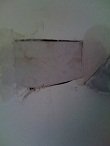
Place the Hammock Patch in the hole in the wall being careful to allow the mesh strips from the back side of the patch to fold through the sides and out the front. Set the long ends of mesh tape in the mud on the wall and wipe off excess mud. Using a six-inch drywall knife, secure the mesh tape strips in place.
While setting the mesh tape strips in the hot mud, make sure the elevation of the drywall patch matches that of the surrounding drywall. If the patch is sticking out too far from the surface, push it in slightly, if it is indented from the surface, pull the mesh tape strips to draw out the patch closer to the surface.
Ensuring that the Hammock Patch is sitting perfectly level with the surrounding surface on all sides will make it easier to float the patch evenly with the rest of the wall. The goal of course is to finish the patch so that no one will be able to tell it was ever there.
Step 6
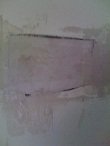
Place more mesh tape on the surface of the Hammock Patch and surrounding drywall. This mesh tape will provide support to the patch on the front side, preventing it from falling out of the hole. It will also strengthen the seams between the surrounding drywall and the newly placed Hammock Patch.
Step 7
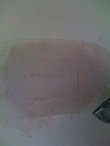
Bed in the mesh tape with hot mud on all sides of the Hammock Patch. Take care to remove any excess. Leave only enough drywall mud for the tape to sit in. Allow the hot mud to harden before moving to the next step.
Step 8
Using lightweight all-purpose or regular all-purpose drywall compound, apply two or three very thin layers of drywall mud to the surface of the patch. Make sure to allow the mud to dry between coats.
For quicker results you can use hot mud for all finish coats however, you may need to use a couple of skim coats to achieve the same level of smoothness when matching smooth wall finishes.
For best results use a ten-inch, or larger, drywall knife, to apply the second and third coats. The key to applying these surface coats is to use just enough mud to cover the underlying layer of mud while not building up the surface too high.
Finally
Once everything is thoroughly dry, sand the Hammock Patch lightly with 150 grit sandpaper to remove any lat marks or knife scratches. Using high-quality paint, apply primer to the patch. Using a primer on the new drywall patch helps ensure the final paint texture will match the existing wall.
For best results, you may need to re-paint the entire wall from corner to corner. This will help to blend both the texture and color of the new paint on the patch with that of the existing surface.
If the existing surface is textured, you will want to retexture the patch to match the surrounding texture. Matching drywall texture is no easy task. Please read our article about matching existing drywall textures. It explains the keys to creating a drywall texture that perfectly matches one applied previously.
If you are patching a smooth-wall surface, the type of paint roller you choose is extremely important. Paint applied with a roller has an eggshell texture that is unique to the type of roller used.
You may also want to read about level five finishes for smooth drywall surfaces.
